


This blog shares all about
Family and Consumer Science!
If you only see
my most recent post..
Do click on the archive to
view all my posts!
ENJOY!


I'm Jia Li
home economics teacher in training!
join my journey as we explore
the wonders of this amazing subject!
Support Us!

Saturday, November 20, 2010, 1:48 AM
concurrently happening activities @ C&T class!
C&T assignments updates! There's 3 more submission needed to complete!Firstly, the Table Runner!
The basic table runner is made up by sewing 3 pieces of fabric together (2 purple on the side, and the white with butterfly prints on the center).
Then, to add design to the table runner, tea cups (they're prints from another fabric) were selected. Double-sided interfacing is ironed on so that the tea cups can adhere to the table runner. To secure the tea cups on the table runner, I used the zig-zag stitch and machine stitch around the tea cups.
Then next step is to embroider monograms on it ("PARTY for 2!"). Have to hood the area where the monogram will be embroidered on, then select the font, re-size the monogram, and orientate it so that the monogram will be upright. The actual embroidering process is only THREE MINUTES! Fast and efficient way to beautify you fabrics! =)
Left the last step, which is to sew up the sides and the table runner is DONE!


Secondly, the Door Hanger!
 |
| After sealer is applied |
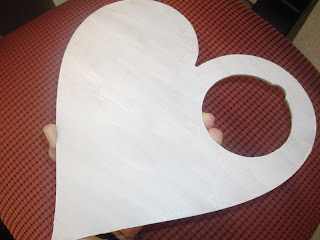 |
| After the 1st layer of paint |
For my hanger, I'd painted it baby pink. As my napkin has red roses, a subtle pink background can complement the red roses without stealing its focus.
 |
| The napkin that I'm using |
Step 3: Select the designs on the napkins and cut them with care. Arrange them on the hanger. Apply art glue over the design very gently, starting from the centre of the design to minimise creases.
 |
| Apply the glue with extreme care! |
 |
| The almost completed door hanger! Going to paint my name on! |
Last, but not least, Embroidery of monogram on the hand towel!
It's similar to embroidering on the table runner, except that due to the difference in material, the hooding is slightly different.
As the towel is made of piled fabric, instead of placing a interfacing underneath the fabric to reinforce the fabric, a plastic sheet is placed on the area to be embroidered. This helps to ensure that the stitches will not "sink" into the piled fabric so that the embroidery can be seen clearly.
The machine is working fine as it embroider the monogram until there's only 3 more alphabets left!
Have to unpick the half done word with 3 alphabets embroidered on before I can re-embroider the word!
 |
| This is where the disaster happened! |
Labels: DCX 131 Teaching of Clothing and Textiles